Peel each garlic clove
Lightly smash your garlic cloves with the flat edge of a knife until the skin breaks
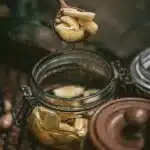
Add the cloves to a clean glass jar
Slowly pour honey over garlic until all garlic is covered. You might need to take breaks to allow the honey to drip to the bottom of the jar. You can also use a wooden spoon (don’t use metal because sometimes that can react with the ferment) to gently move the garlic and honey around. You are looking for each garlic clove to be coated in honey.
Add enough honey so that every clove is coated, including the ones on top
Add a small square of baking paper, cloth, or jar cover to the jar before adding the lid. Sometimes this might mean removing the rubber seal or only using the metal ring, depending on your jar. Just be sure your jar is not sealed tightly as the ferment will produce Co2.
Store on your counter for a few weeks. Every day or so check in with your ferment by stirring (with a clean wooden spoon) or gently sealing, then turning the mixture to ensure all of the cloves are coated in honey. Just make sure to loosen or remove the seal again once you turn the jar!
After a few weeks the honey will loosen and the garlic will become a little bit softer and might even change color (which is a normal fermentation reaction of garlic!). The garlic will be subdued in its flavor and the honey will taste a little bit like garlic.
At this point the fermented garlic honey is ready to be stored and eaten. You can store in a cool dark place for many months, even a few years if stored well.